
Streaming konten favorit Anda secara langsung sekarang dimungkinkan melalui add-on Plexus untuk Kodi. Plexus adalah pengaya streaming pihak ke pihak ketiga yang gratis. Ini memungkinkan pengguna untuk melakukan streaming konten favorit mereka dengan mudah. Tetapi menginstal add-on kodi pihak ketiga, terkadang menjadi masalah bagi pengguna baru. Anda akan dipandu cara memasang pleksus pada Kodi langkah demi langkah di blog ini.
Ini adalah panduan instalasi terperinci untuk menjelaskan Anda cara menggunakan plexus kodi addon pada sistem operasi yang berbeda. Setelah membaca panduannya, Anda akan dapat mengakses stream Plexus dengan mudah.
Cara Memasang Plexus pada Kodi Krypton Versi 17 atau lebih tinggi
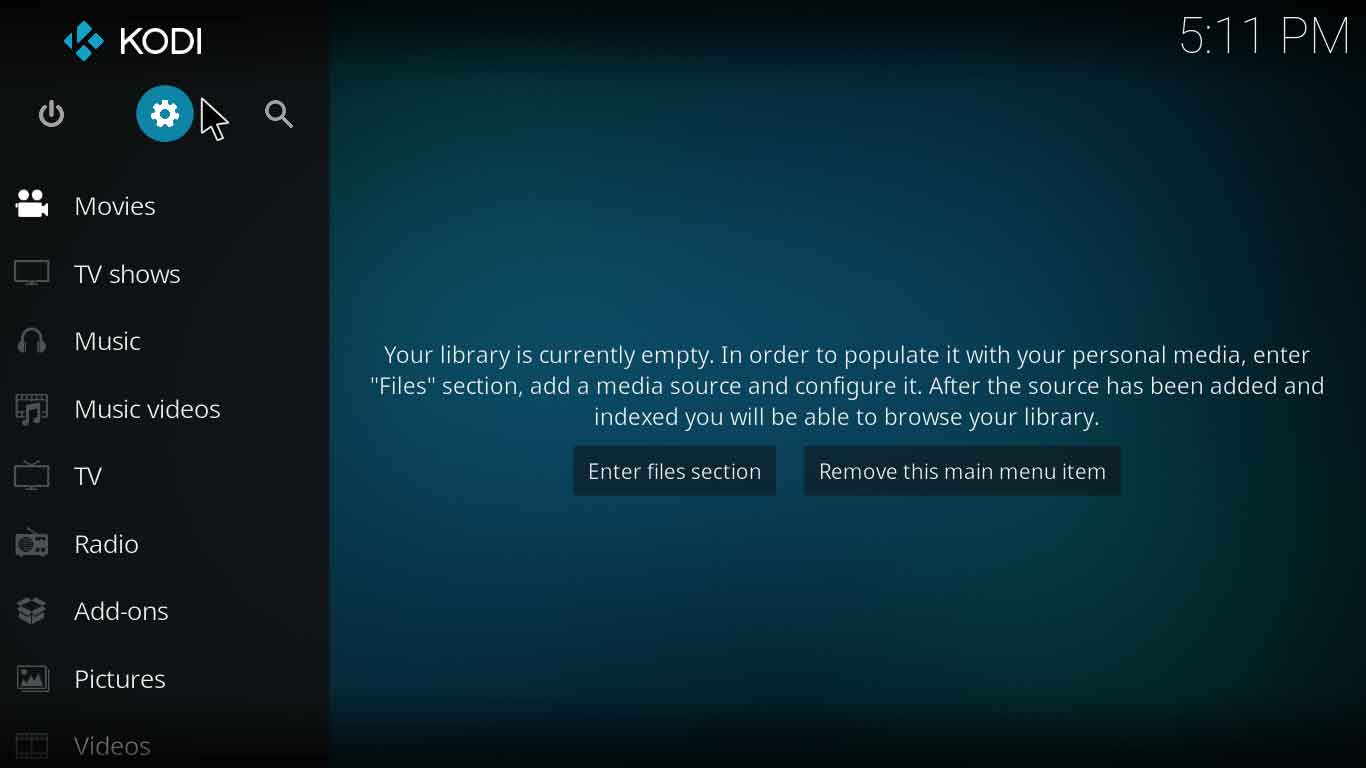
- Lari Aplikasi kodi. Klik pada pengaturan ikon ada di kolom sebelah kiri.

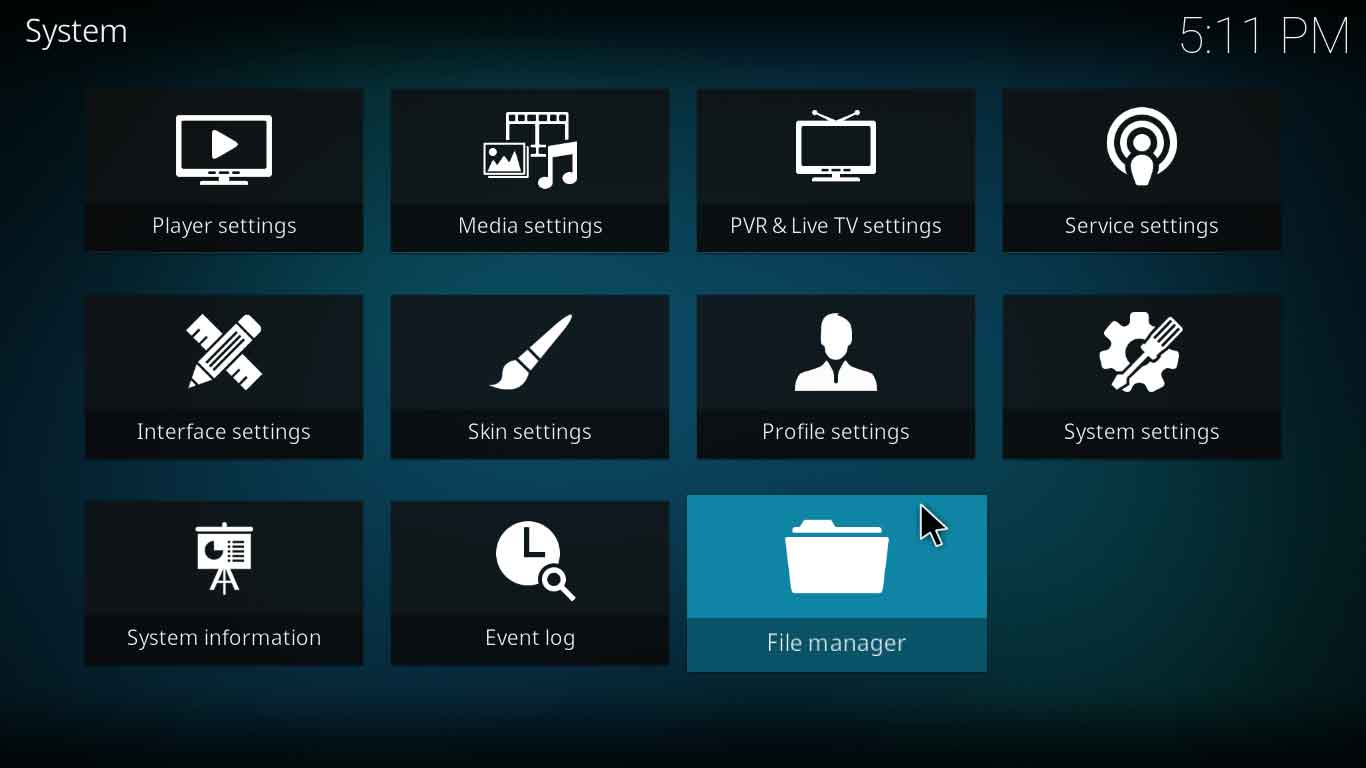
- Beberapa opsi akan muncul, pilih “Manajer File”.
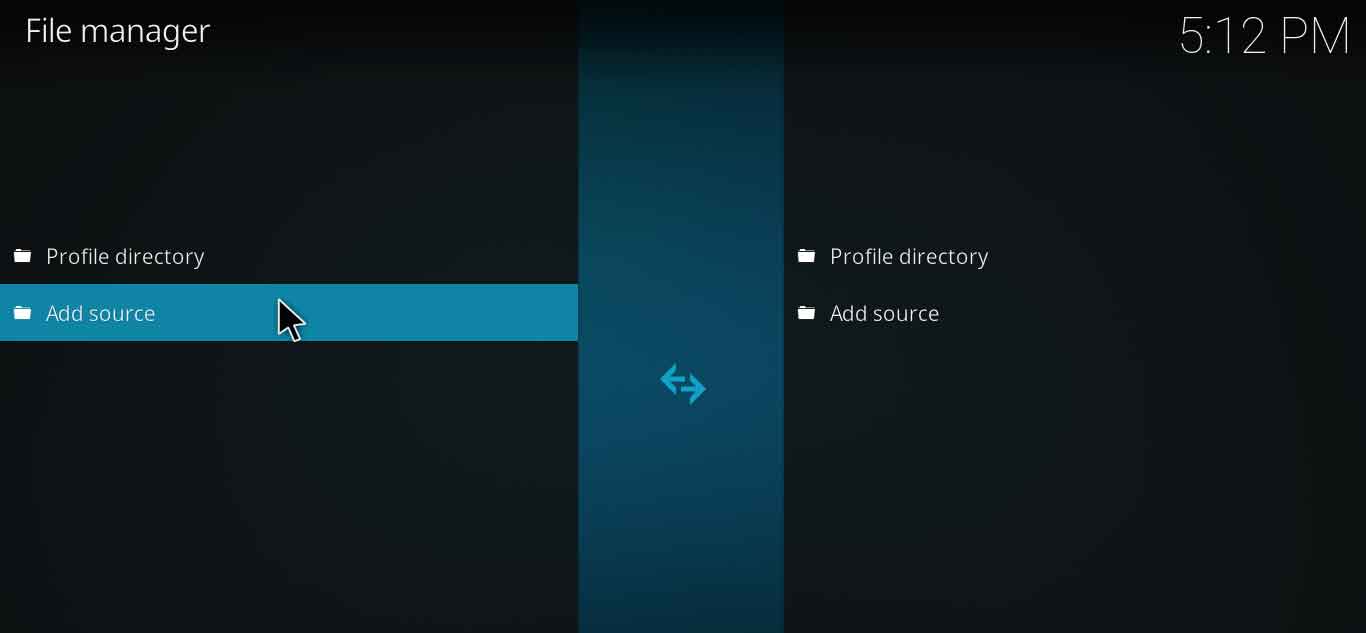
- Sebuah jendela baru akan muncul, pilih “Tambahkan sumber”Dari kolom sebelah kiri.

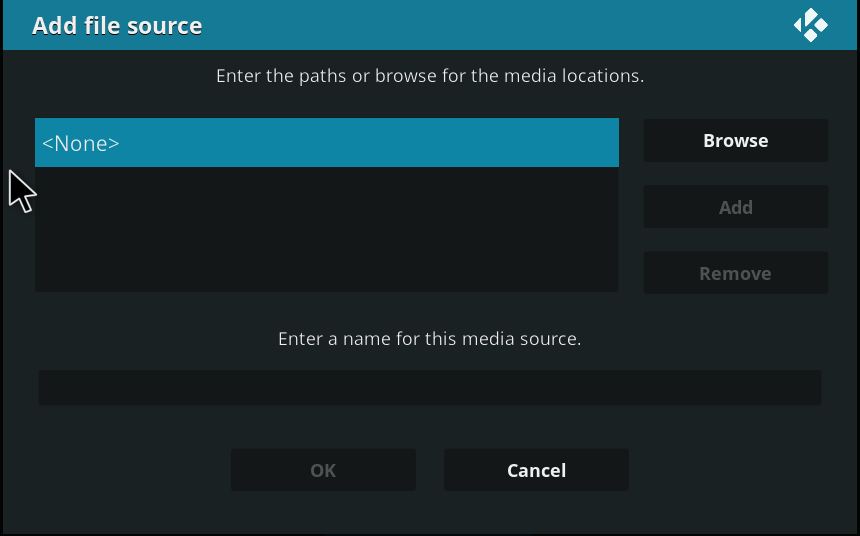
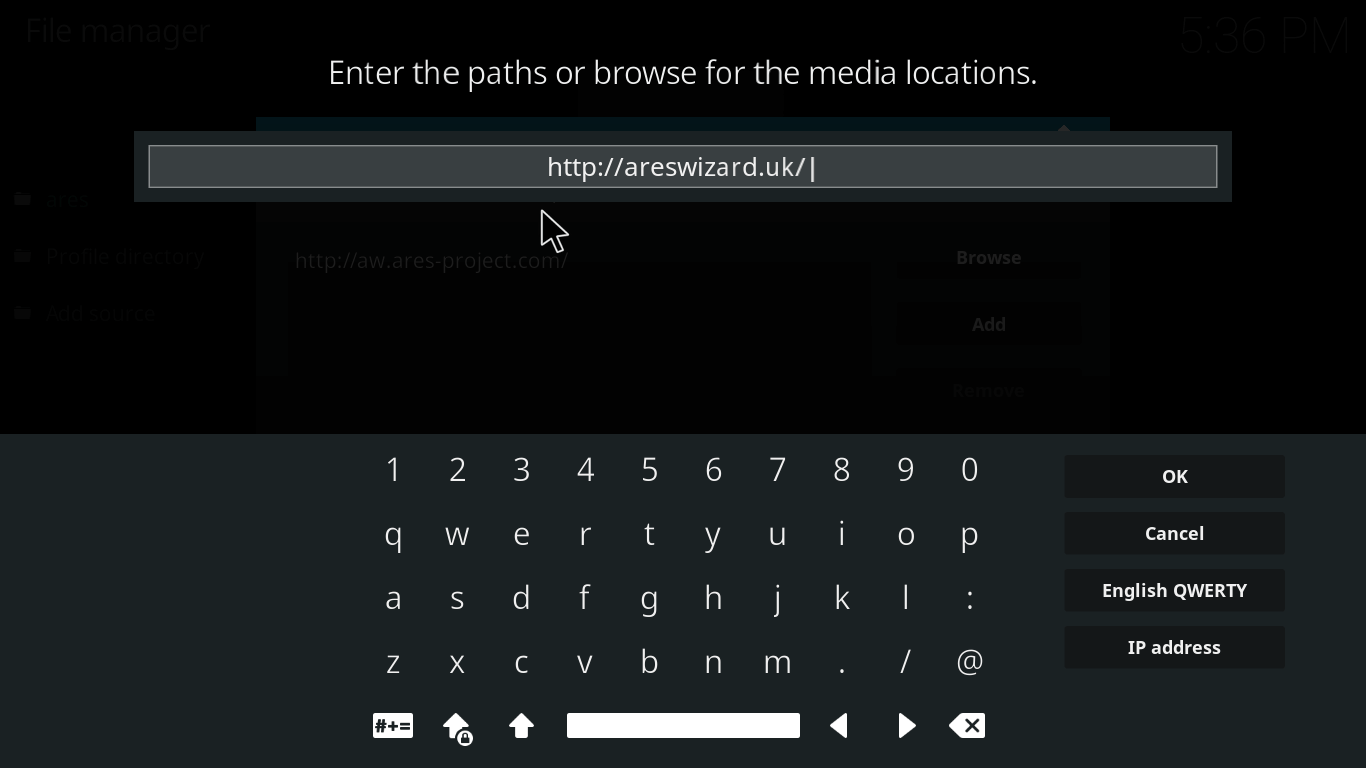
- Ketika jendela tambahkan sumber diminta, klik dua kali pada baris yang menunjukkan “”.

- Di sini, masukkan tautan “http://areswizard.uk/“Dan klik”Baik”.
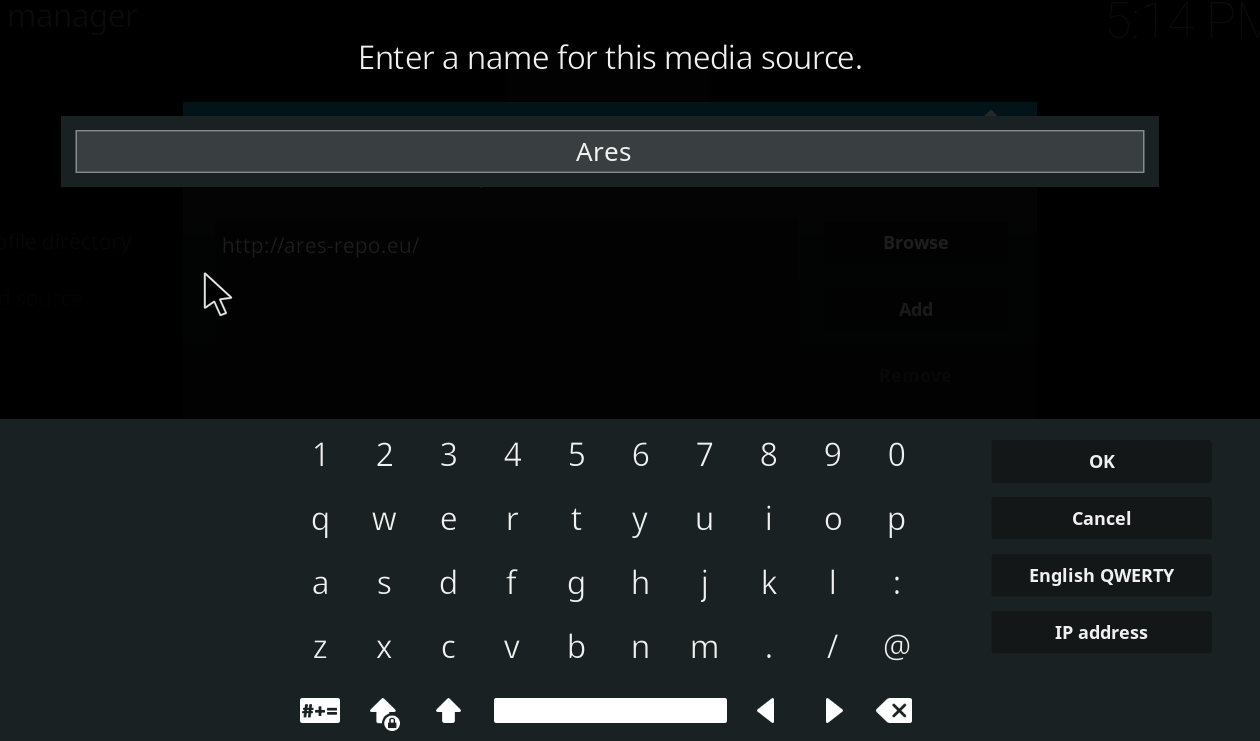
- Sekarang masukkan nama “ares“, Klik”Baik”.

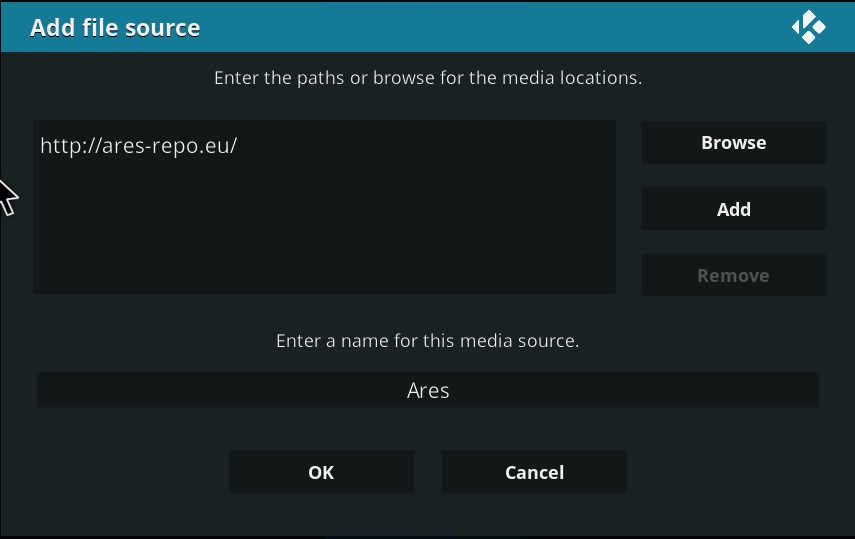
- Setelah tautan dan nama dimasukkan, klik Oke lagi dan Anda akan kembali ke Manajer File.

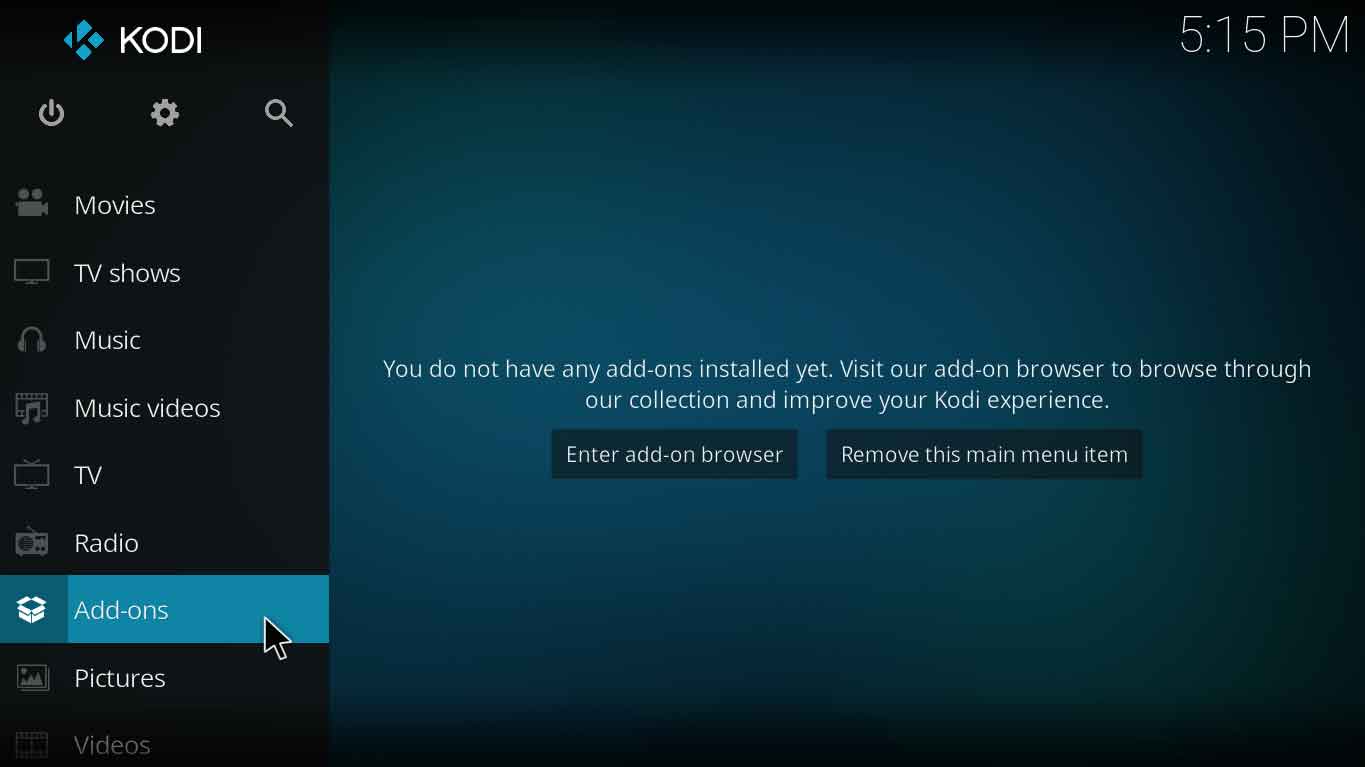
- Sekarang kembali ke layar utama Kodi dan klik Add-on.
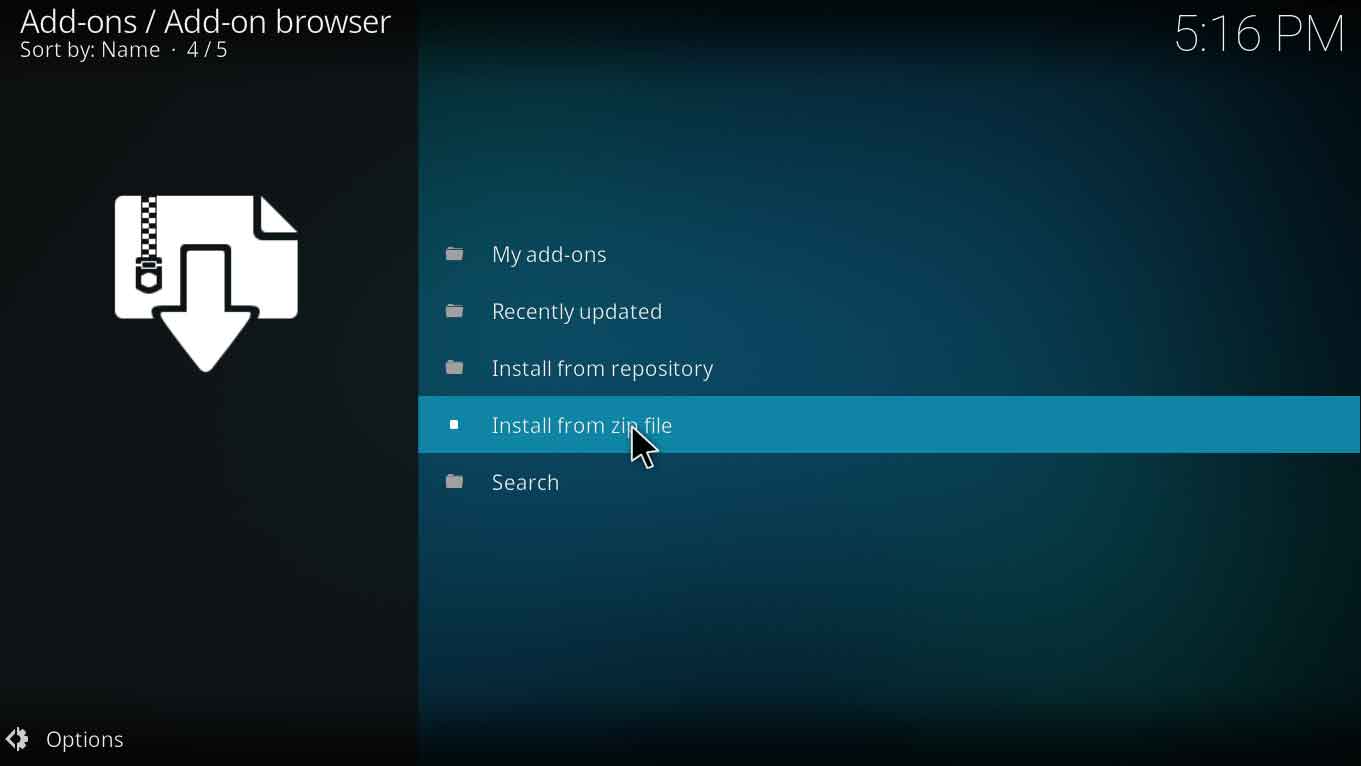
- Sekarang lihat bagian atas kolom sebelah kiri, ikon kotak akan muncul. Klik pada ikon kotak itu. Klik “Instal dari file zip“Dan klik”ares”.

- Ini akan menampilkan beberapa repositori kodi, klik “repository.aresproject-0.1.0.zip”
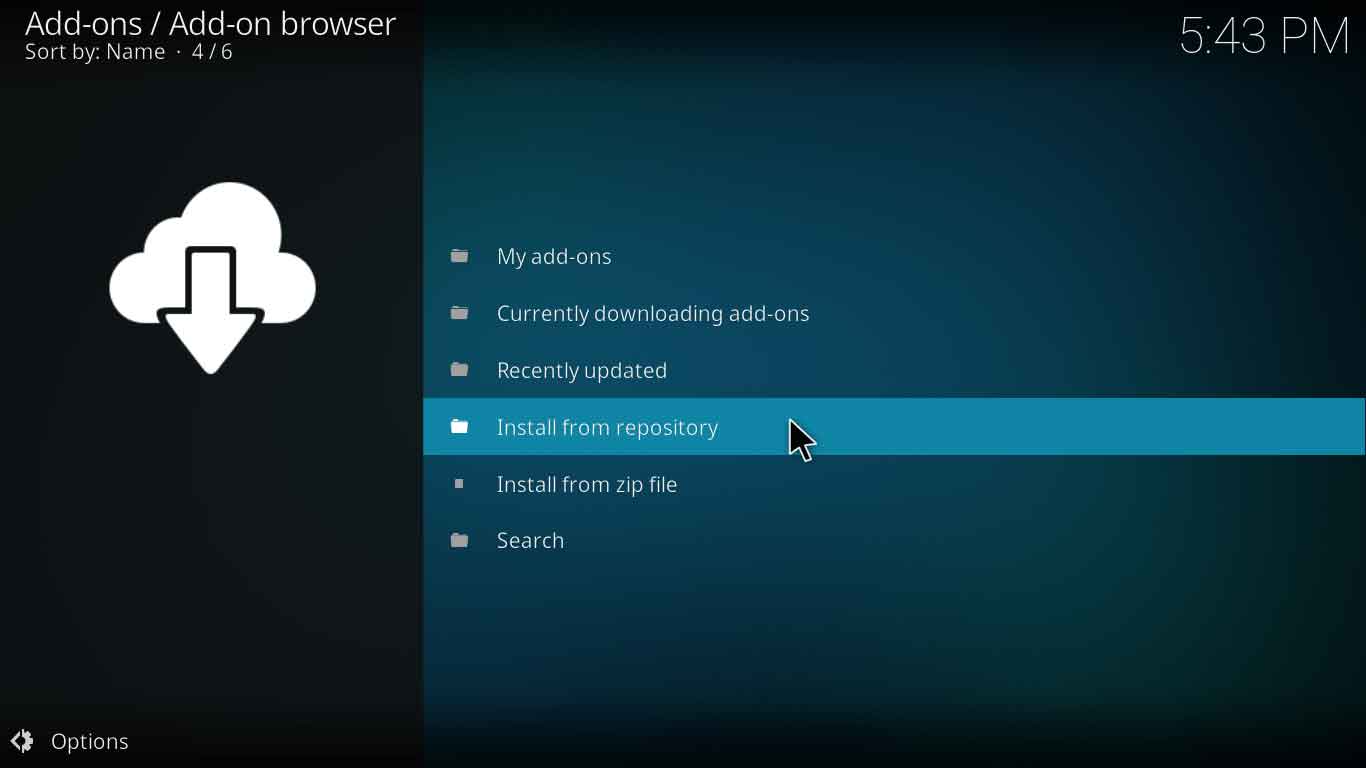
- Sekarang tunggu hingga repositori diinstal, sebuah pesan akan muncul setelah instalasi. Setelah pemberitahuan muncul, klik “Instal dari repositori”.
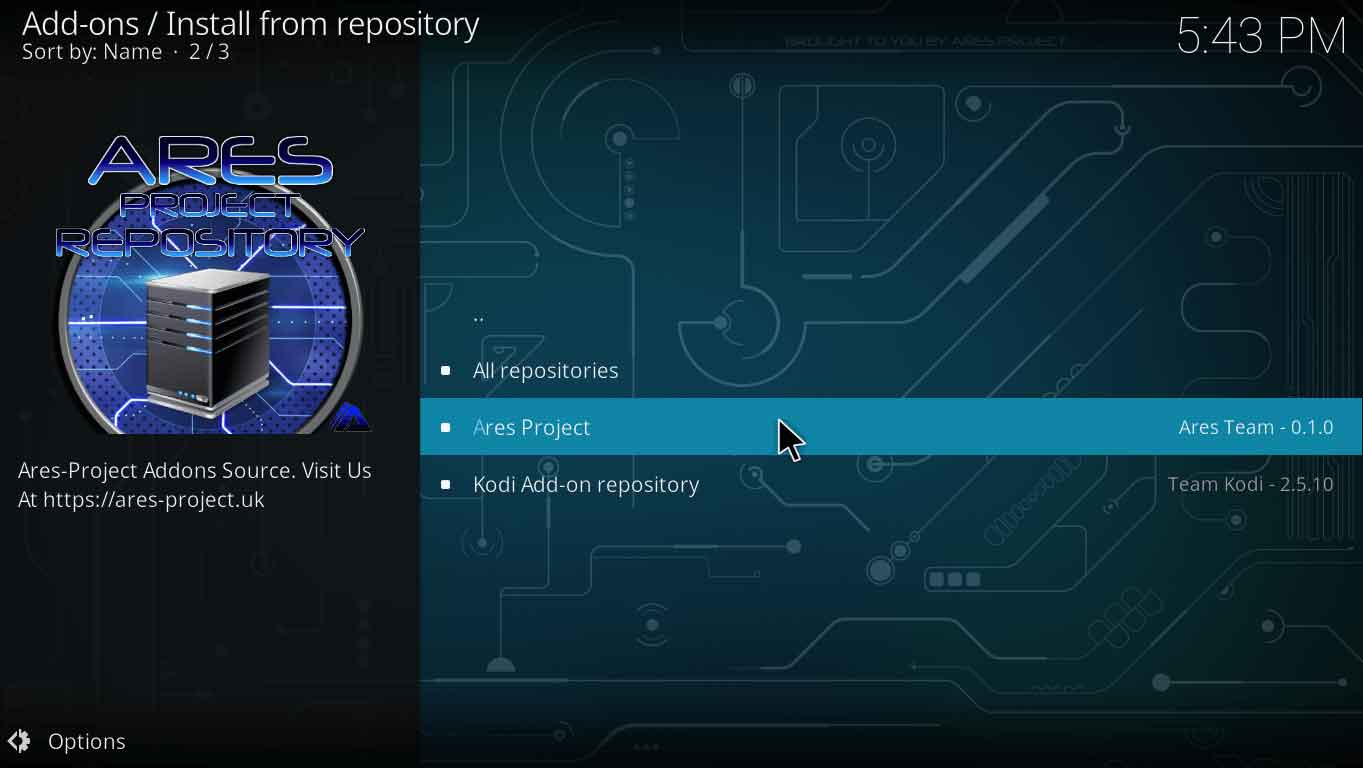
- Sekarang pilih “Ares Project”.
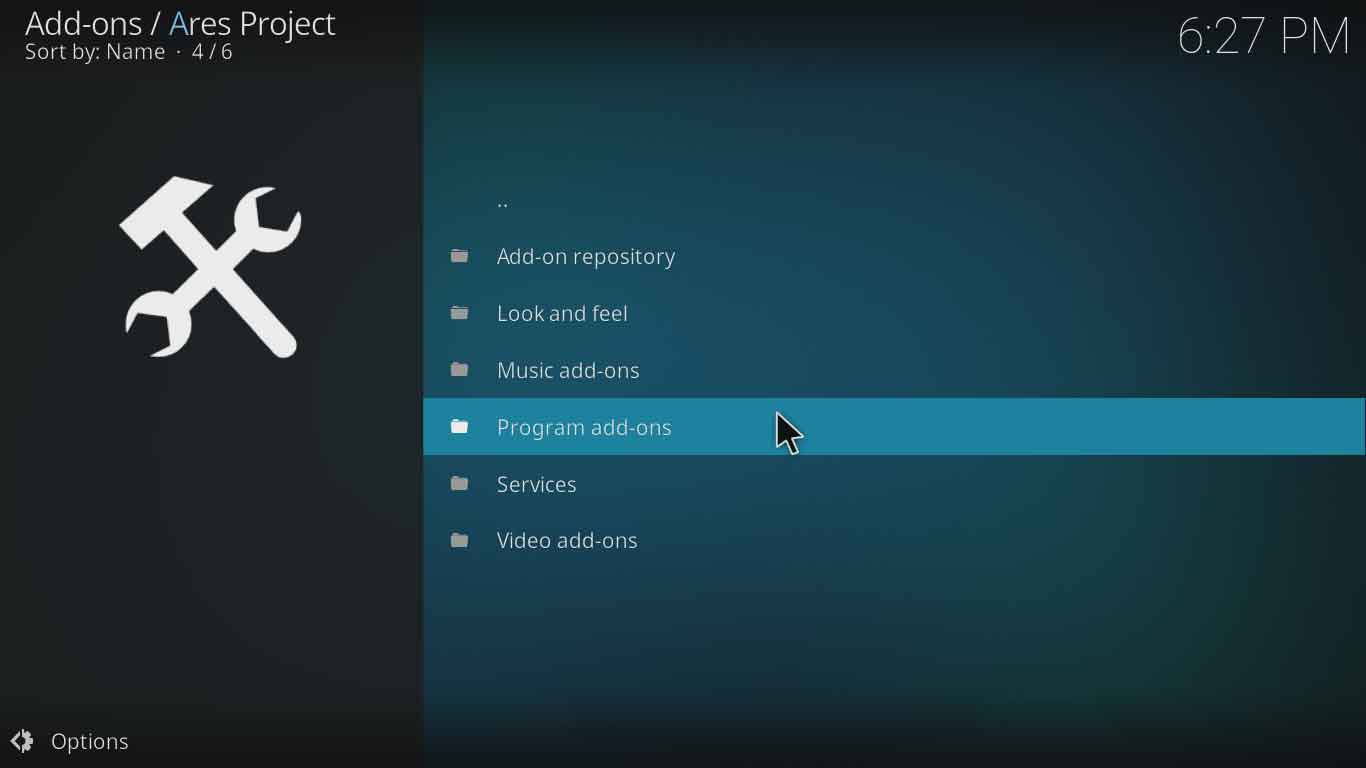
- Tunggu pesan tambahan yang diaktifkan. Klik pada “Program add-ons”.
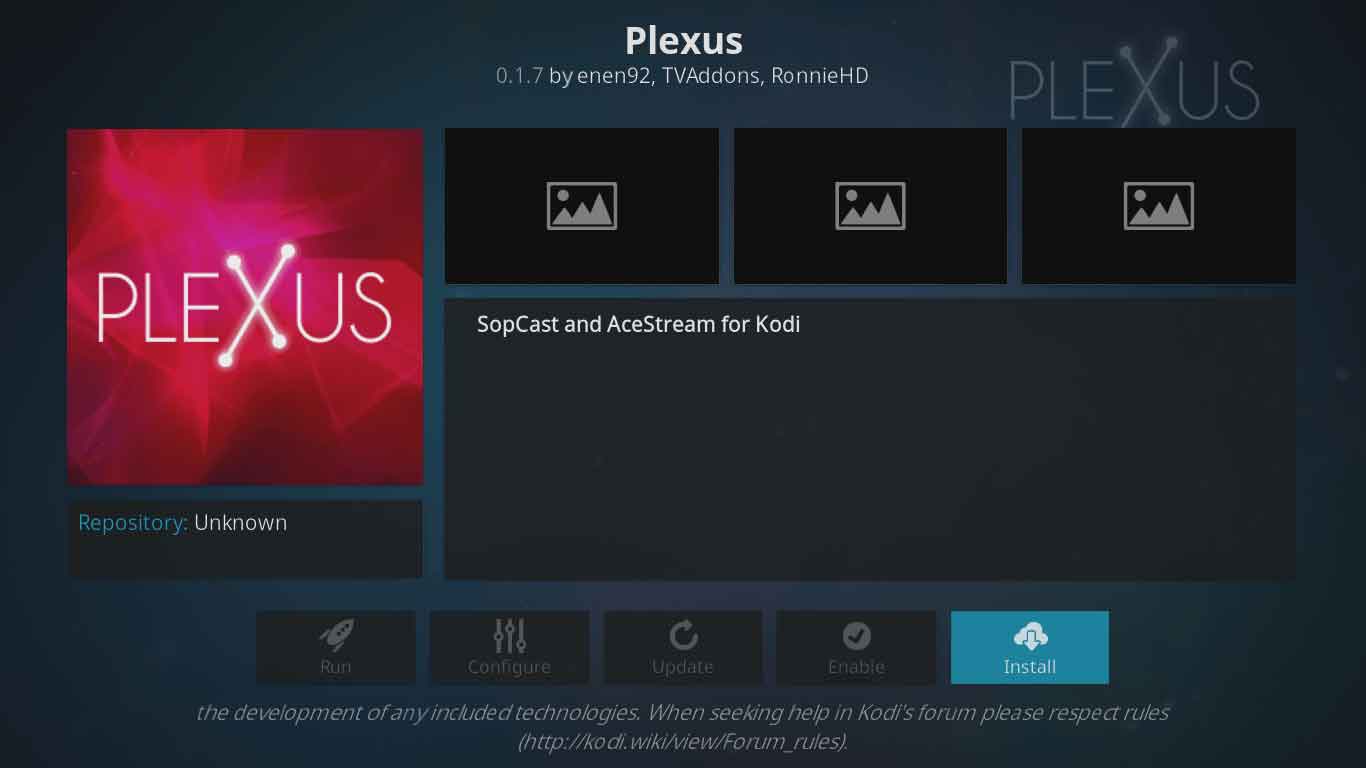
- Pilih “Plexus”. Klik “Instal”.
- Tunggu notifikasi “add-on enabled”. Setelah pemberitahuan muncul, Anda dapat mengakses aliran pleksus.

Cara Memasang Plexus untuk Kodi Jarvis Versi 16 Atau Di Bawah Ini:
- Lari Kodi aplikasi.
- Klik SISTEM dan buka Manajer File.
- Klik “Tambahkan Sumber”.
- Klik pada baris yang menyatakan “”.
- Masukkan tautan “http://ares-repo.eu” dan klik “Selesai”.
- Beri nama tautan ini sebagai “ares” dan klik “Baik”.
- Kembali ke layar beranda Kodi.
- Klik “Sistem”.
- Klik “Add-on”.
- Dari janda ini klik “Instal dari file zip”.
- Klik “ares”.
- Pilih “repository.aresproject-x.x.x.zip”.
- Repositori akan diinstal, Anda harus menunggu sampai “Add-on diaktifkan”Notifikasi muncul.
- Klik “Instal dari repositori”.
- Pilih “Proyek Ares”.
- Klik “Pengaya program”.
- Klik “Kekusutan”.
- Klik Pasang.
- Tunggu notifikasi “add-on diaktifkan” muncul.
- Itu dia, Plexus sekarang diinstal.
Cara Memasang Plexus di Kodi MAC:
- Sebelum saya memberi tahu Anda cara menggunakan pleksus pada Kodi, Anda harus terlebih dahulu tahu cara menginstal Kodi pada Mac. Berikut ini adalah langkah-langkah untuk menginstal Kodi di Mac:
- Unduh Kodi untuk Mac dari https://kodi.tv/download “.
- Buka gambar disk Kodi.
- Instal perangkat lunak pada Mac Anda dengan menyeret dan menjatuhkan ikon Kodi ke folder Aplikasi.
- Jalankan aplikasi Kodi.
- Sebuah pesan mungkin muncul yang menyatakan bahwa aplikasi ini tidak dapat diluncurkan karena berasal dari “pengembang tidak dikenal”.
- Keamanan Terbuka & Pengaturan privasi dan “Izinkan aplikasi diunduh dari:”
- Itu dia! Kodi akan berjalan dan dapat digunakan sesuai.
- Sekarang prosedur untuk menginstal Plexus pada Kodi mirip dengan yang dibahas di atas. Anda dapat merujuk mereka untuk mengakses aliran Plexus.
Perbaikan Plexus Kodi / Tidak Berfungsi / Kesalahan / Masalah:
Plexus kodi addon biasanya memiliki banyak masalah dalam pemasangan atau penggunaannya. Beberapa masalah mungkin:
Instalasi Plexus Kodi Gagal
Ada masalah tertentu yang muncul saat menginstal Plexus pada Kodi karena kesalahan file sumber. Karena ini adalah add-on pihak ketiga, tautan sumber terus memblokir atau server mereka biasanya turun. Sebagian besar pengguna mencoba menginstal Plexus menggunakan sumber “http://fusion.tvaddons.co” Sumber ini ditutup beberapa bulan yang lalu dan kemudian diterbitkan ulang. Pengguna menghadapi masalah pemasangan karena tautan sumber yang usang.
Larutan
Untuk menangani masalah instalasi seperti itu, Anda harus tahu dulu memeriksa saat ini; tautan yang diperbarui yang ditayangkan. Saat ini, http://areswizard.uk/ dan http://areswizard.co.uk/ adalah sumber langsung dan dapat digunakan untuk menginstal Plexus di Kodi tanpa menghadapi masalah apa pun.
Plexus Kodi Stream Lagging
Penjelajahan yang lambat dan keterlambatan aliran adalah masalah besar dengan platform streaming online. Mereka mungkin bertahan dari waktu ke waktu, menciptakan situasi yang menjengkelkan bagi pengguna.
Larutan
Masalah ini dapat dengan mudah diatasi dengan menginstal Ares wizard. Pergi ke program add-on dan instal Ares Wizard. Setelah menginstal Ares Wizard, Anda dapat menghapus cache dan thumbnail. Ini akan menyelesaikan masalah dan penjelajahan dan streaming Anda akan berjalan dengan sempurna Atau dapatkan penyihir kodi terbaik ini berfungsi.
Plexus Kodi Repositori Kadaluarsa
Sebagian besar waktu, Anda akan menghadapi masalah menginstal pengaya setelah menginstal file zip. Beberapa repositori ditawarkan untuk menginstal, tetapi Anda mungkin bingung memilihnya.
Larutan
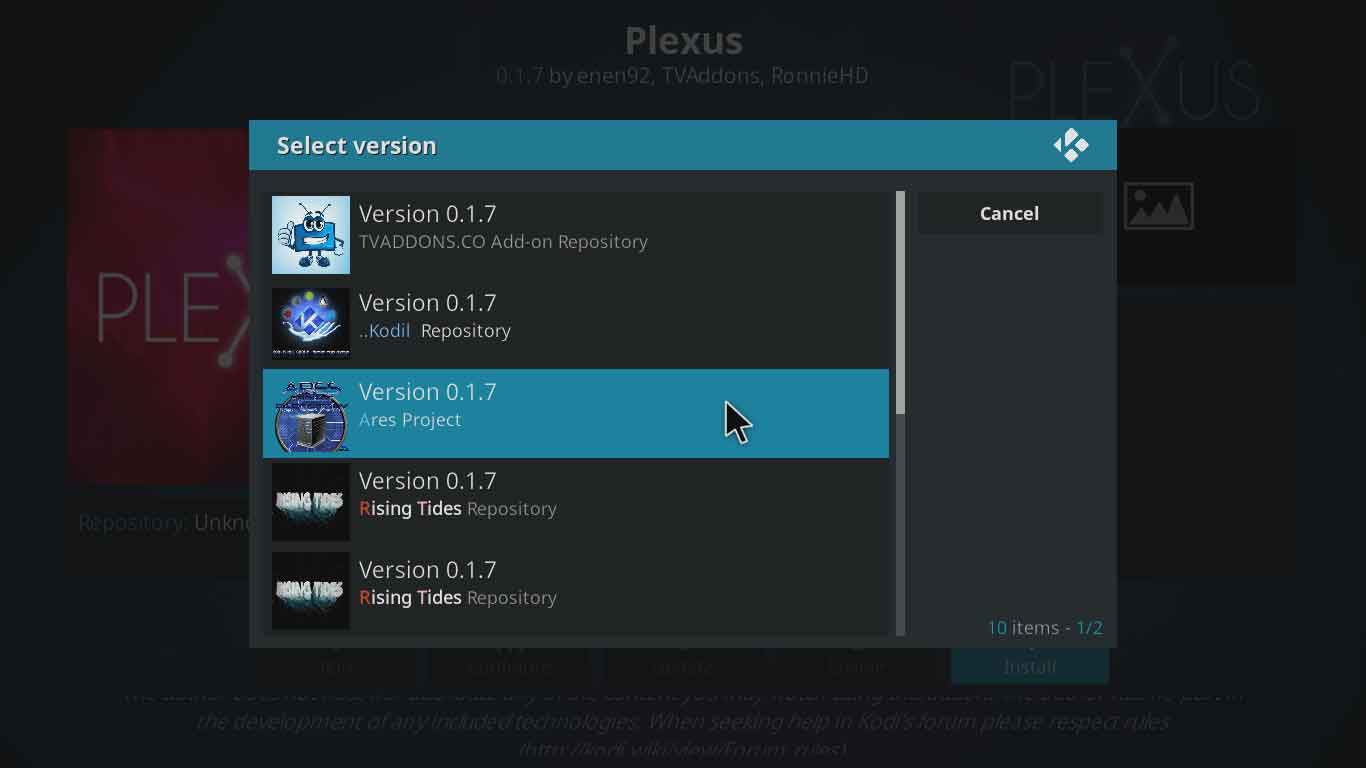
Cara terbaik untuk memilih repositori yang benar adalah dengan melihat mana yang merupakan repositori yang diperbarui. Pilih versi terbaru dari daftar untuk menginstal add-on. Ares Project 0.1.7 adalah repositori terbaru untuk menginstal add-on Plexus. Lihat panduan kami tentang cara membuka blokir repositori menggunakan kodi vpn.
Membungkus Semuanya
Kesimpulannya, menginstal Plexus pada Kodi tidak terlalu merepotkan. Meskipun ini adalah proses yang panjang tetapi masih pengalaman yang Kodi berikan layak, terutama ketika datang ke Plexus. Prosedur pemasangan Kodi di Plexus hampir serupa di setiap platform. Masalah yang muncul saat pemasangan terjadi karena ini adalah pengaya pihak ketiga dan tidak resmi sehingga dukungan mereka tidak selalu tersedia atau tidak sesuai dengan standar. Demikian pula, repositori tetap menutup, menyebabkan masalah saat instalasi. Namun, saya telah menyelesaikan semua aspek dengan terperinci untuk membantu Anda menikmati pengalaman Plexus. Pada akhirnya saya akan merekomendasikan Anda untuk selalu menggunakan layanan Kodi VPN untuk memastikan privasi Anda dan mengamankan diri Anda.
28.04.2023 @ 09:51
Streaming your favorite content live is now possible through the Plexus add-on for Kodi. Plexus is a free third-party streaming extension that allows users to easily stream their favorite content. However, installing third-party Kodi add-ons can sometimes be a problem for new users. You will be guided on how to install Plexus on Kodi step by step in this blog. This is a detailed installation guide to explain how to use the Plexus Kodi add-on on different operating systems. After reading the guide, you will be able to access Plexus stream easily.
Installing Plexus on Kodi Krypton Version 17 or higher:
1. Run the Kodi application. Click on the settings icon in the left column. Several options will appear, select “File Manager”. A new window will appear, select “Add Source” from the left column.
2. When the add source window is prompted, double-click on the line that shows “”. Here, enter the link “http://areswizard.uk/” and click “OK”. Now enter the name “ares”, click “OK” again.
3. After the link and name are entered, click OK again and you will return to the File Manager. Now go back to the Kodi home screen and click Add-on. Now look at the top of the left column, an icon box will appear. Click on that box icon.
4. Click “Install from zip file” and click “ares”. This will display several Kodi repositories, click “repository.aresproject-0.1.0.zip”.
5. Now wait for the repository to install, a message will appear after installation. After the notification appears, click “Install from repository”. Now select “Ares Project”. Wait for the additional message to be activated. Click on “Program add-ons”. Select “Plexus”. Click “Install”. Wait for the “add-on enabled” notification. After the notification appears, you can access the Plexus stream.
Installing Plexus for Kodi Jarvis Version 16 or below:
1. Run the Kodi application. Click on SYSTEM and open File Manager. Click “Add Source”. Click on the line that states “”. Enter the link “http://ares-repo.eu” and click “Done”. Name this link as “ares” and click “OK”.
2. Go back to the Kodi home screen. Click “SYSTEM”. Click “Add-on”. From this window, click “Install from zip file”. Click “ares”. Select “repository.aresproject-x.x.x